|
With the berth under control I decided to move to the cabin. This is the heart of the boat and I knew it was going to require a lot of time both in the boat and at the drawing board. Our intended use of this boat include extended trips on rivers. With a projected cruise speed of about 6 or 7 knots what has been a five day run in Therapy will take 15 days in the True Grit. And since I don't plan to push as hard as I do in Therapy it will more likely be a 20+ day trip. So it needs to be livable and comfortable. We did have several specific goals to meet - #1 - A standing shower. This was #1 on my wife's list so it was #1 on my list too. Plus we wanted enough water capacity to not feel guilty about using it. #2 - Comfortable seating. Most small cruisers I have been aboard have the main seating placed at the table (small campers are similar). These are usually designed to drop down to form an additional bunk. To accommodate this and to save space they usually have seats sitting perfectly parallel to the sole and backs at a very straight 90 degrees to the seat. This is fine for sitting while eating but in my opinion horribly uncomfortable for other activities like reading or watching television. Look around your house. You will not find a single seat designed this way and there is a reason for that. Yes, as mentioned before this is one of those compromises but in my mind it is a very poor one. Since we spend maybe and 45 minutes a day eating but possibly hours reading or watching TV (if weathered in could be entire days) to me it makes no sense to for the only place to sit to be so unpleasant. If you feel you must have the additional sleeping space for guest then maybe, but this is not part of our goal. We decided our primary concern was this boat be comfortable for TWO. As a result, I wanted either a comfortable settee or two chairs where we could sit and relax. #3 - A propane refrigerator. I know, this is normally tabu in a boat. But I have owned a boat with an electric refrig and in my opinion it is futile to try to run it off batteries unless you have built-in generator. Refrigerators suck watt after watt of power and require hours of running the genset to replenish the batteries. I may have been able to incorporate a built-in generator in to the hull but not only did I not want the complexity but adding a gasoline motor below deck is something I wanted to avoid. Plus I had decided that one of my overall design goals were not to have ANY thru-the-hulls. May not be logical but my take is why bore holes in the bottom of a boat if it can be avoided. Particularly a wooden boat. I had already decided I wanted a small marine propane heater installed to take the chill off cool mornings so a propane system was going to be in place any way. For me the refrigerator was just the next step. Twenty years ago all propane devices were discouraged in boats. But now stove and heaters are getting far more common and accepted. In my opinion the key is proper installation and operation. If done right these can be safe and efficient. As an extra safety precaution I will be installing a marine propane alarm with a sensor in the cabin and another in the bilge. If gas is sensed it sounds and alarm and automaticly shuts off the tank. I honestly believe it is only a matter of time until refrigerators are also added to the list. In fact, today there are many boats using them with no problems. If you have ever read any of Skippers Bob's books about cruising you know he was a big supporter of propane refrigs. He traveled thousands of trouble free miles with one installed in his trawler. #4 - An aft open area. We also wanted a table and seating outdoors aft of the cabin. We envision many of our meals out there as well as relaxing and reading. #5 - In addition, we wanted space for a microwave. One item I decided to omit was a conventional range / stove. First off, neither of us are cooks and even at home we keep our menus simple. Plus from my experiences with boats and campers cooking in the cabin adds a tremendous amount of heat to a place that is probably too warm. I decided that most of our cooking will be outdoors with a gas grill and a portable butane burner. If need be the burner could be used inside but I see that rarely happening. I feel the additional unobstructed countertop space will be more useful than interior cooking appliances. Searching for the best use of space, I spent hours and made over 30 drawing of different interior layouts. I became somewhat paranoid about it but finally worked out what I thought was the best compromise (that word again). The result can be seen on page one of this log. Looking at it now doesn't seem like a big deal but it was. You may also note sitting in the back an item labeled "genset". No, I didn't change my mind. I already own a Honda EU 2000 portable generator. The symbol represents where it could be stored. Any time it is used it will be moved outside the hull to the swim platform.
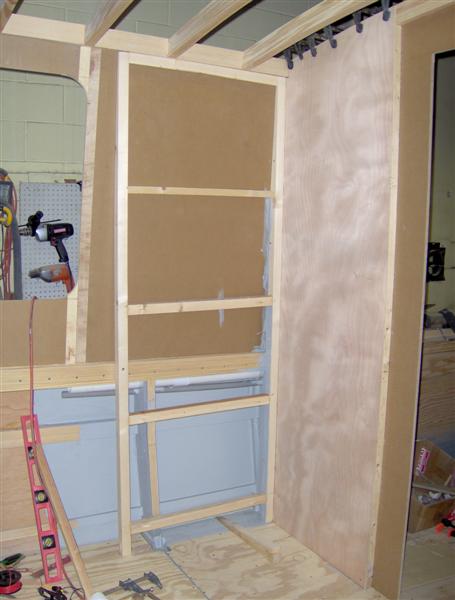
First was roughing out the cabinet for the shower. Once installed I would not be able to access the area behind it so I added two sections of 2" plastic pipe as raceways for wiring and engine control cables. They can be seen at the top of the painted area.
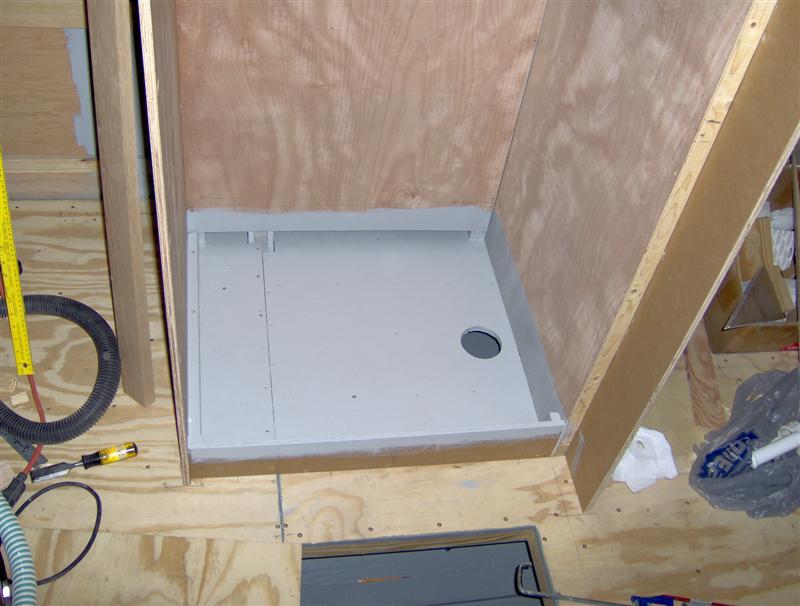
Here I am preparing to add a sub floor on which the shower pan to sit. This had to be installed because the sole it self is not level as it is slanting down as you move aft for drainage.
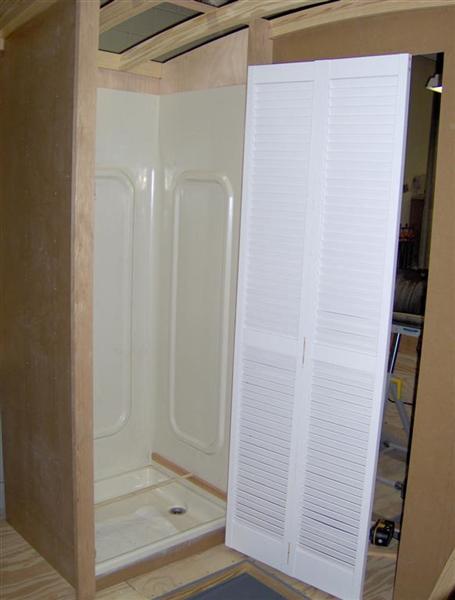
And here it is with the 24" x 30" pre-manufactured shower enclosure installed. This is a unit designed for a camper and I paid a fortune for it - considering what it is - a U shape of thin plastic. A well built residential unit would have been less than half what this cost. Unfortunately, I could not find one small enough to fit in the space available. I entertained the idea of fabricating one out of plastic panels available at Lowes or Home Depot but hate the look of caulked corner joints and the mold that always seems to grow there. My wife is kinda of a clean freak and she said, "Spend the bucks!" Again, the shower is her main equipment request. There will be a shower curtain installed behind the louvered door to keep the water contained. The idea of the door is both for looks and to allow ventilation so things dry out.
A view with the door closed. The door itself is a residential unit I cut down in height to fit the opening.
Next I decided to move forward and work on the galley. But before I could do that I had to design the helm seat and define the space needed for it. Since I thought there was no use in trying to reinvent the wheel, I searched the internet for suggestions on chair design but found very little useful information. And to me this was important. This is a place that I will end up sitting for hours on end - it needs to be comfortable. I finally drug out a simple chair I had in the back room of the office that seems to sit and fit me very well. Plus it's lack of thick padding allowed for easier measuring. Using it yielded the seat height and angle as well as the back angle in relation to the seat. I also used it to sort out the position of the outboard engine control. As you can see I made a scale mock-up and tried it both on the chair and in the boat. I then built a mock-up of the helm seat and it proved very helpful. One thing I found was that even with a reasonable amount of padding, a flat seat bottom is less comfortable than a cupped one. But on the seat back the cup didn't seem to make as much difference. Because of this I decided a bent bottom was worth the effort.
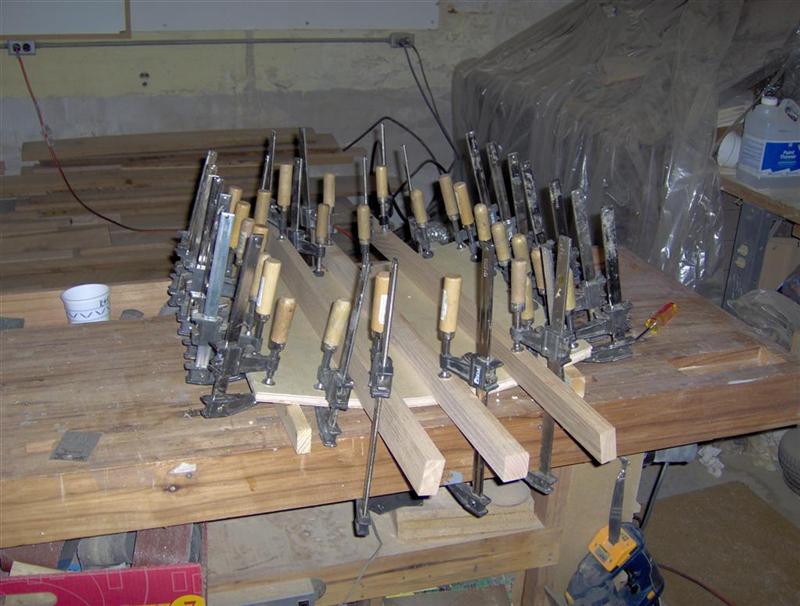
I decided to make the seat bottoms by laminating three pieces of 3/16" plywood. Didn't take the time to make a jig, just clamp them across my wood working bench using some scraps to form the shape I wanted
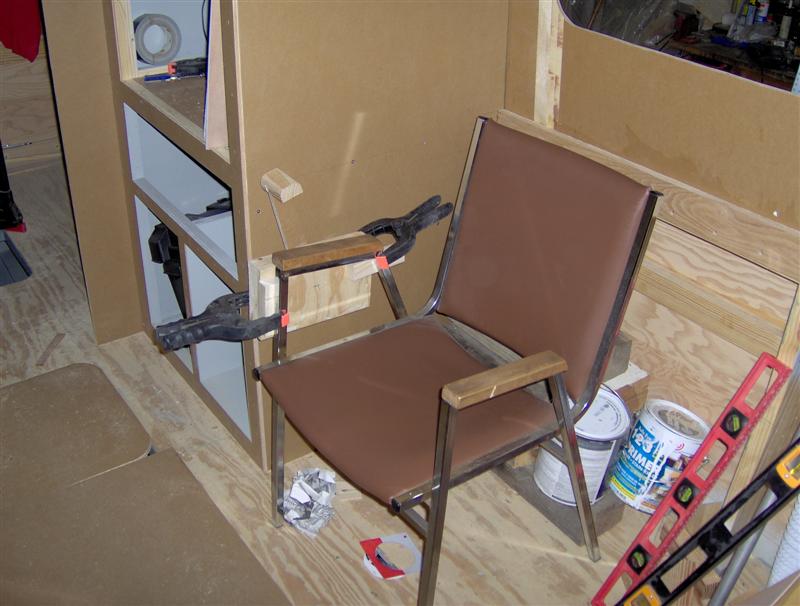
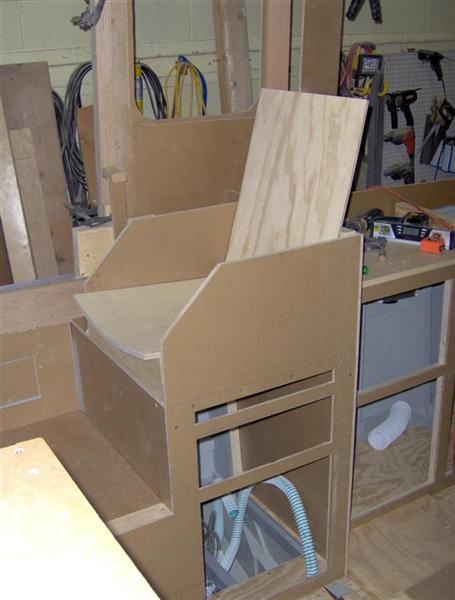
And here is the rough helm seat. I wanted arm rest and the chair again helped me size those. You can see the "engine control" clamped to the side wall. The slot under the seat will accommodate a chart board that will slide out. Below that is a drawer for charts and then a utility locker. The battery charger will be mounted inside as well as the fresh water pump. Also behind the seat back will be the 120v AC panel with wire running down through the locker.
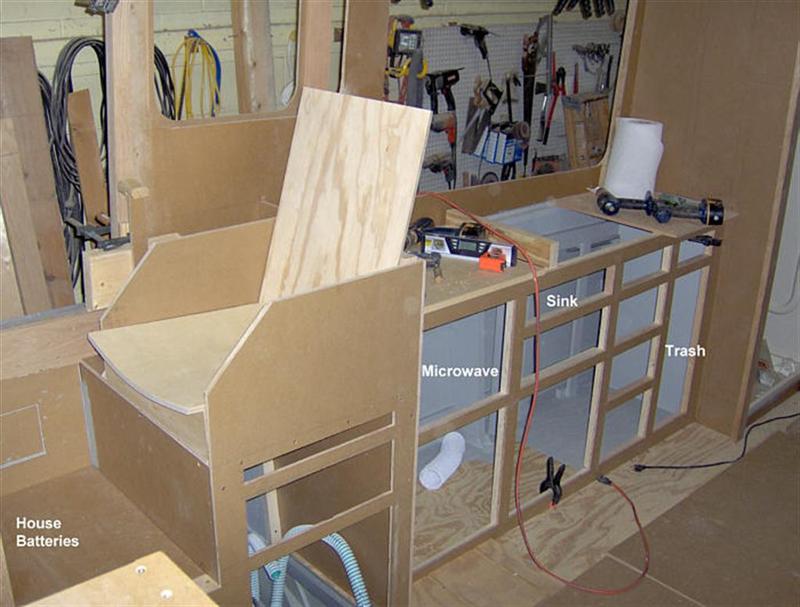
I then added the galley cabinets. The labels indicate where items will be positioned
This page is getting a little long so I will continue on the next page
|